
Today’s post will be the first technical post of this series and will focus on the script you need to write to generate an Infrastructure as a Service (IaaS) virtual machine (VM) in Azure. For my purposes, I’ve created such a Bicep template to create this resource to speed up our process of making IaaS VMs to host SQL Server instances–for our applications that cannot utilize a Platform as a Service (PaaS) version of SQL Server.
Since the post is very detailed and long, please use the table of contents below to jump forward to specific sections if you would like.
What’s in this post
- What the template does
- Getting the entire template file
- How to know what configurations to choose
- Writing the template
- Summary
What the template does
In the template I am about to walk through, I first create the Azure IaaS virtual machine resource. I then create the minimum required networking resources–a network interface and a network security group, which sets up access rules for the server. I then create a resource to install the SQL IaaS extension on the VM, which will connect the main virtual machine resource with the SQL virtual machine resource in the portal. My final step of the template is to create a Custom Script Extension resource which allows me to run a PowerShell script on the VM after it’s created, which finalizes the required setup I need for my machine. All these steps work together to make the bare minimum requirements of the type of VM I need to create.
Getting the entire template file
I have broken down a full Bicep template into its parts in the post below. If you would like to see the template in its entirety for an easier overview, you can find it on my GitHub here.
How to know what configurations to choose
When I first started writing this template, I had no idea what configuration values to choose. When looking at the Microsoft documentation for the VM resource type in Bicep, it seemed like there were endless possibilities for what I could choose to configure the machine. That was overwhelming to me at first. I then had the idea that I would compare the list of possible values in the documentation for the resource type to the settings of an existing resource with settings similar to what I wanted for my new machine.
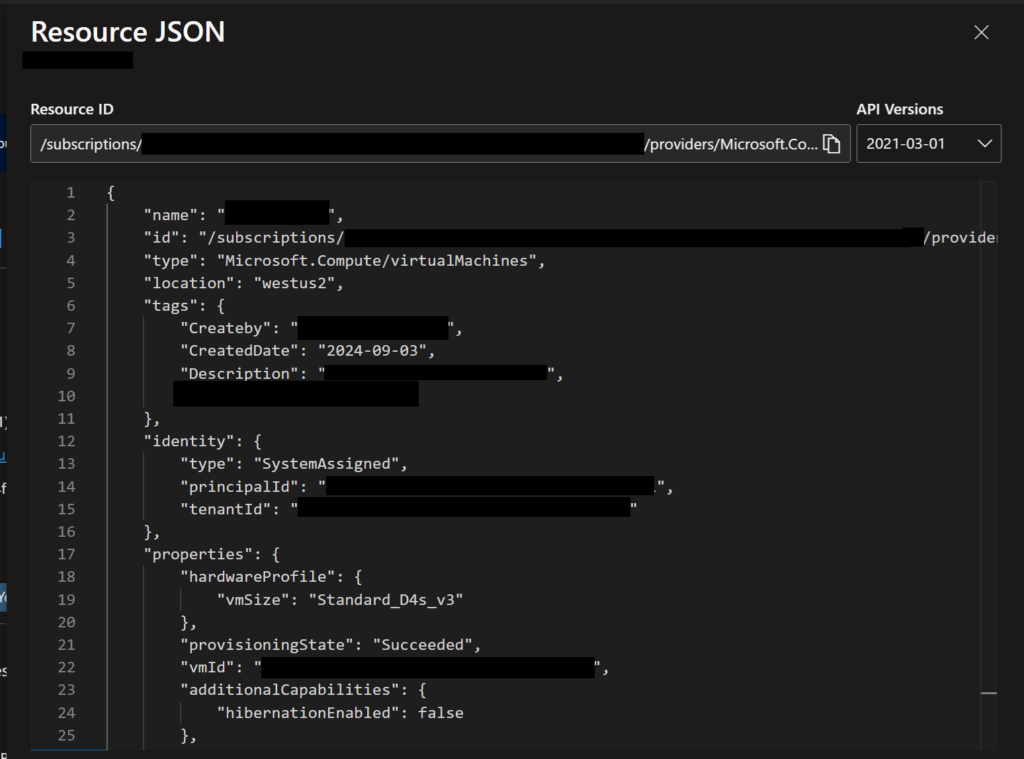
That effort originally started with me looking at the normal portal view of the resource, but I didn’t stick with that for long. I quickly realized that the portal view of settings doesn’t show a lot of values that I was looking for. But I figured out that you can view all the setup information for a given resource in the portal in a JSON format, which is very similar to the Bicep formatting I needed. I believe this JSON document is likely what would be used by Azure Resource Manager (ARM) to create the same resource, which is why it’s available for every resource in the portal.
To view the JSON version of the resource settings, navigate to the resource in the portal, then near the top right corner of the Overview page, you will have a link to “JSON View”.
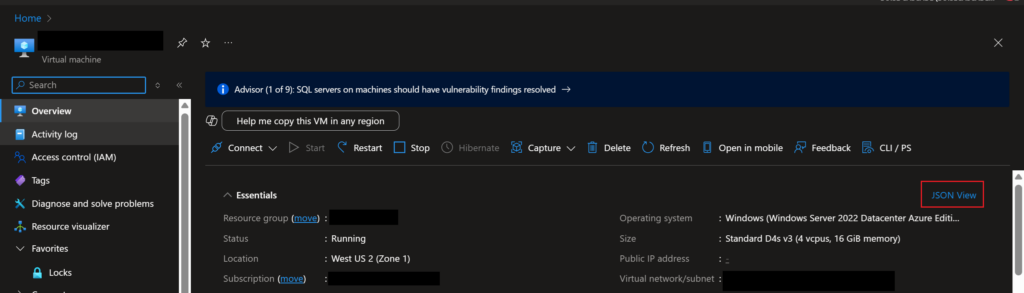
When you open that pane, you will see something like the following, with all pertinent details of the resource, which you can then use to help you create your Bicep template.
Writing the template
Parameters
When creating a new Bicep template, the first thing you’ll need to decide (apart from what specific resources you need to create) is what parameters you will need to input into the template, which will usually be fed in from a pipeline that deploys the template. For my template, I created the following parameters:
- vmName (string): The name I want to give to the VM that will be created
- dataDiskNameBase (string): A base string that I will use to name the data disks that I will create and attach to the VM. This base name follows my team’s standard naming strategy for disks.
- adminPassword (string): The password that should be assigned to the total admin user the VM will be created with
- adminUsername (string): The username that should be given to the ultimate admin user created for the VM
- domainAdminPassword (string): This password is used in the PowerShell script I run after the VM is created
- storageAcctKey (string): The key associated with the storage account where my PowerShell script (used by the custom script extension resource) is stored
- storageAcctName (string): The name of the storage account where my PowerShell script is stored
- resourceTags (object): A list of key-value pairs for the resource tags I want assigned to the VM after it’s created
Variables
Variables in Bicep are used so that you don’t have to repeatedly type the same values over and over, like variables in other scripting and programming languages. For my Bicep template, I created the following variables:
- sqlExtensionName: This variable is used to give a name to the resource for the SQL IaaS extension
- customScriptExtName: Used to store the name I want to give to the custom script extension resource
- initializeDisksScript: The URL to the PowerShell file that I have saved in a storage account, which will be run by the custom script extension resource
Resource: Virtual Machine
Once you have your parameters and variables defined, the next step is to define the main virtual machine resource. Depending on the settings and configurations you need for your VM, you may need to define this resource differently. In my template, I have the following definition for the VM resource:
resource sqlVM 'Microsoft.Compute/virtualMachines@2024-07-01'= {
  location:'westus2'
  name: vmName
  properties:{
    hardwareProfile: {
      vmSize:'Standard_D4s_v3'
    }
    additionalCapabilities:{
      hibernationEnabled:false
    }
    storageProfile:{
      imageReference: {
        publisher: 'MicrosoftWindowsServer'
        offer: 'WindowsServer'
        sku: '2022-datacenter-azure-edition-hotpatch'
        version:'latest'
      }
      osDisk:{
        osType: 'Windows'
        name: '${vmName}_OsDisk_1_${uniqueString(vmName)}'
        createOption:'FromImage'
        caching:'ReadWrite'
        deleteOption:'Delete'
        diskSizeGB: 127
      }
      dataDisks: [for i in range(0,3):{
        lun: i
        name: '${dataDiskNameBase}${i}'
        createOption:'Empty'
        caching:'None'
        writeAcceleratorEnabled: false
        deleteOption:'Detach'
        diskSizeGB: 256  // The disks should all have 256 GB except for the 4th which should have 128, so this checks the index value
      }
      ]
      diskControllerType:'SCSI'
    }
    osProfile: {
      computerName:vmName
      adminUsername: adminUsername
      adminPassword: adminPassword
      windowsConfiguration:{
        provisionVMAgent: true
        enableAutomaticUpdates: true
        patchSettings:{
          patchMode:'AutomaticByPlatform'
          automaticByPlatformSettings:{
            rebootSetting:'IfRequired'
            bypassPlatformSafetyChecksOnUserSchedule: false
          }
          assessmentMode:'ImageDefault'
          enableHotpatching:true
        }
      }
      secrets: []
      allowExtensionOperations: true
    }
    networkProfile:{
      networkInterfaces:[
        {
          id:netInterface.id
        }
      ]
    }
    diagnosticsProfile:{
      bootDiagnostics:{
        enabled:true
      }
    }
  }
  tags:resourceTags
  identity:{type:'SystemAssigned'}
}
That is a lot of script to look through, so I will break it down into its components and explain what each does.
Location and Name
Location and name are pretty self-explanatory: the Azure region you want the resource deployed in and the name you want to give to the resource. For the location, I specified ‘westus2’, and for the name, I specified the vmName parameter that I would get input from when deploying the template.
Hardware Profile
Next in the resource definition is the specification of all properties for the VM, which is the meat of the resource definition, so I’ll walk through it section by section. The first property set is the “hardware profile”, which is the VM hardware specification/type. I chose a standard version.
hardwareProfile: {
      vmSize:'Standard_D4s_v3'
    }
Additional Capabilities
Next is to specify “additional capabilities” for the VM, which I only use to set the hibernation setting to off (false).
additionalCapabilities:{
      hibernationEnabled:false
    }
Storage Profile
The next section is much longer, which is where we specify everything needed for the storage that should be attached to the VM, using the storageProfile property.
storageProfile:{
      imageReference: {
        publisher: 'MicrosoftWindowsServer'
        offer: 'WindowsServer'
        sku: '2022-datacenter-azure-edition-hotpatch'
        version:'latest'
      }
      osDisk:{
        osType: 'Windows'
        name: '${vmName}_OsDisk_1_${uniqueString(vmName)}'
        createOption:'FromImage'
        caching:'ReadWrite'
        deleteOption:'Delete'
        diskSizeGB: 127
      }
      dataDisks: [for i in range(0,3):{
        lun: i
        name: '${dataDiskNameBase}${i}'
        createOption:'Empty'
        caching:'None'
        writeAcceleratorEnabled: false
        deleteOption:'Detach'
        diskSizeGB: 256
      }
      ]
      diskControllerType:'SCSI'
    }
Image Reference
The “imageReference” object within the “storageProfile” property is where you specify the type of operating system you want to install on the VM, which you do by choosing a standard Azure VM image that should be installed on the machine. You could also specify a Linux-based image or even your own custom image if you have one already. In the future, I will be updating this template to use a custom image that already has SQL Server and SSMS installed, so I no longer have to do those steps manually as well.
imageReference: {
        publisher: 'MicrosoftWindowsServer'
        offer: 'WindowsServer'
        sku: '2022-datacenter-azure-edition-hotpatch'
        version:'latest'
      }
OS Disk
This object is where you specify the specific Operating System information for the VM, as well as the name of the disk the OS will be installed on, and how big that disk should be.
osDisk:{
        osType: 'Windows'
        name: '${vmName}_OsDisk_1_${uniqueString(vmName)}'
        createOption:'FromImage'
        caching:'ReadWrite'
        deleteOption:'Delete'
        diskSizeGB: 127
      }
Data Disks
The next step of defining the storage profile for the VM is to create any data disks that you want the VM to have. For my case, I need to create 3 separate data disks, because that’s what my team requires for our SQL Server setup. To easily create the data disks with fewer lines of code and less manual specification, I’ve used a loop in the dataDisk specification to loop through 3 times to create 3 different disks.
dataDisks: [for i in range(0,3):{
        lun: i
        name: '${dataDiskNameBase}${i}'
        createOption:'Empty'
        caching:'None'
        writeAcceleratorEnabled: false
        deleteOption:'Detach'
        diskSizeGB: 256
      }
      ]
To enable the process to create 3 unique disks, I specify the name of each disk to use the parameter “dataDiskNameBase” which I pass in when deploying the template, so they’ll get a unique but useful name. I have all my disks created as Empty, since that’s the only way I could get the template to deploy successfully. Each disk is created with 256 GB of storage.
Disk Controller Type
The final setting for the storageProfile property is the diskControllerType, which is what controls the connections between the VM and disks. I set it to “SCSI” because that is what our existing VMs were using.
diskControllerType:'SCSI'OS Profile
The next property that needs to be specified for the VM resource is the osProfile, which gives more specific settings that should be used for the Operating System setup.
osProfile: {
      computerName:vmName
      adminUsername: adminUsername
      adminPassword: adminPassword
      windowsConfiguration:{
        provisionVMAgent: true
        enableAutomaticUpdates: true
        patchSettings:{
          patchMode:'AutomaticByPlatform'
          automaticByPlatformSettings:{
            rebootSetting:'IfRequired'
            bypassPlatformSafetyChecksOnUserSchedule: false
          }
          assessmentMode:'ImageDefault'
          enableHotpatching:true
        }
      }
      secrets: []
      allowExtensionOperations: true
    }
The computer name for the OS is set to the same vmName parameter I used for the general resource name above. The adminUsername and adminPassword are set to the input parameters with those same names as well. This admin user is the super user that the VM is created with, which will be what is used to initially set up the computer and will allow you to log in even before your VM is joined to your domain and allows your normal login process.
Next, you need to specify the configurations particular to Windows, and I pretty much set these all to what appear to be default values.
Finally, you can specify any necessary secrets, but I had none, and then you can choose to allow extensions or not, which I allowed.
Network Interface
When creating an IaaS VM, you will need to specify a network interface resource that connects network security groups to the VM. You do this by specifying the interface through the networkProfile property.
networkProfile:{
      networkInterfaces:[
        {
          id:netInterface.id
        }
      ]
    }
This section is very short. The only thing I specified within the networkProfile is the ID for the network interface resource I will create later in the template. I specify that value by using the semantic name of the resource (netInterface) then added .id to get to the ID value of that resource. Bicep is smart enough to know that the network interface object should be created before the VM, so specifying the ID in this method will not cause any deployment issues.
Diagnostics, tags, identity
The final things that I specify for the VM resource definition is the diagnosticProfile, where I specify that I want boot diagnostics to be saved, the tags that should be assigned to the resource after it has been created, and the Identity the resource should be created with, which I put as the system-assigned managed identity (not a custom identity).
Resource: Network interface
Next up, we need to specify the creation of a network interface, which is required for the VM to use the network security group we specified in that resource script above. The network interface resource specification is much simpler than that of the VM.
resource netInterface 'Microsoft.Network/networkInterfaces@2024-05-01' = {
  name:'${vmName}-${uniqueString(vmName)}'
  location: 'westus2'
  tags:resourceTags
  properties:{
    ipConfigurations:[
      {
        name:'ipconfig1'
        type:'Microsoft.Network/networkInterfaces/ipConfigurations'
        properties:{
          privateIPAllocationMethod:'Dynamic'
          subnet:{
            id:resourceId('USWest_2_Network_Services','Microsoft.Network/virtualNetworks/subnets','Subnet_1_Name','Subnet_2_Name')
          }
          primary:true
          privateIPAddressVersion:'IPv4'
        }
      }
    ]
    enableAcceleratedNetworking:true
    enableIPForwarding:false
    disableTcpStateTracking:false
    networkSecurityGroup:{
      id:nsg.id
    }
    nicType:'Standard'
  }
}
The first specification of that resource is the name, which I create by combining the name of the VM it is associated with, plus a unique string (using the uniqueString() function) to make the resource name unique but still meaningful. Next, I provide the location the resource should be deployed to, the tags I want to apply to the resource using the input parameter, and finally get into the properties and detailed configurations of the resource.
For the properties of the network interface, we need to create a sub-resource of type “IP Configuration” which is used to specify the subnet the network interface should be deployed to. For the template to appropriately identify and configure information for the subnets that should be used, I had to use a function called resourceID(), to which I fed the subnet names so it could return the IDs of those subnets for use by the IP configuration.
Then, under the properties of the IP configuration, I specified that I want the private IP address of the resource to be given dynamically, that the IP configuration is the primary, and that the IP address version should be IPv4. Which closes out the creation of that sub-resource.
Continuing with the rest of the properties for the main network interface setup, I specified that I want to enable accelerated networking, I did not want to utilize IP forwarding, and I did not want to disable state tracking for TCP. Finally, we come to the most important part of the creation of the network interface, which is to specify the ID of the network security group (NSG) that we want to associate with the interface. To do that link, you need the ID of the NSG, which you can do by combining the semantic name of the NSG resource plus “.id” to retrieve the ID that will be generated when it’s deployed.
The final configuration I specify in the network interface properties is the type, which is Standard.
Resource: Network Security Group
The further we get into the Bicep template, the shorter the resource definitions get, thankfully. Our next resource specification is for the Network Security Group (NSG), which dictates what network traffic will be allowed into and out of the VM we’re creating.
resource nsg 'Microsoft.Network/networkSecurityGroups@2024-05-01' = {
  name:'${vmName}-nsg'
  location:'westus2'
  tags:resourceTags
  properties:{
    securityRules:[
      {
        name:'SQL1433'
        properties:{
          protocol:'Tcp'
          sourcePortRange:'*'
          destinationPortRange:'1433'
          sourceAddressPrefix:'10.0.0.0/8'
          destinationAddressPrefix:'*'
          access:'Allow'
          priority:1020
          direction:'Inbound'
        }
      }
    ]
  }
}
Like with the previous resources, we first specify the name, location, and tags before getting into the property specifications. The properties for this type of resource are fairly simple–just the inbound and/or outbound network access rules. For my resource, I created only a single rule to allow the required inbound traffic for a SQL Server instance. The rule I specified allows inbound traffic from any source IP to port 1433.
Resource: SQL IaaS Extension
The next resource I create in the template is one that allows me to install the SqlIaaSExtension onto the newly created virtual machine, after it’s been created. This extension is what allows you to connect a SQL Server instance installed on an IaaS virtual machine to the Azure portal and to connect to the Virtual Machine resource itself. The resource type for this is extensions under the virtualMachines resource type.
resource iaasExtension 'Microsoft.Compute/virtualMachines/extensions@2024-07-01' = {
  name: sqlExtensionName
  parent: sqlVM
  location: 'westus2'
  tags:resourceTags
  properties:{
    autoUpgradeMinorVersion: true
    enableAutomaticUpgrade: true
    publisher: 'Microsoft.SqlServer.Management'
    type:'SqlIaaSAgent'
    typeHandlerVersion:'2.0'
  }
}
Most of the settings I specified for this extension resource are fairly standard, since there’s not much to change. I gave it the name, location, and tags that I wanted, just like with the rest of the resources. One key property of the resource specification to note is the “parent” value, which is how we tell Bicep/ARM that this resource is related to another we previously specified, so the other resource should be created before this one is. Bicep is usually good at understanding relationships between resources and which should be created first, but for this resource type, you need to specify it explicitly.
Resource: Custom Script Extension for PowerShell
The final resource I specify the creation of in my Bicep template for my IaaS VM is a CustomScriptExtension resource, which allows me to run a custom PowerShell script on the VM I create after it has been created. In my PowerShell script, I run commands to initialize the disks I attach to the VM, since that is not done for you if you create a VM using a Bicep template.
resource customScriptExtension 'Microsoft.Compute/virtualMachines/extensions@2024-07-01' = {
  name: customScriptExtName
  location:'westus2'
  dependsOn:[sqlVM]
  properties:{
    publisher:'Microsoft.Compute'
    type:'CustomScriptExtension'
    typeHandlerVersion:'1.2'
    settings:{
      fileUris:[
        initializeDisksScript
      ]
      commandToExecute:'powershell -file .\\SetUpWindowsVM.ps1 -password "${domainAdminPassword}"'
    }
    protectedSettings:{
      storageAccountName:storageAccountName
      storageAccountKey:storageAcctKey
    }
  }
}
As with the previous resources, I specify the semantic name and location of the resource. I then also must specify the dependsOn value to tell Bicep/ARM that this resource should be deployed after the previously defined resource called ‘sqlVM’. That means that the custom extension resource will only be created after the main VM has been created, as it should be.
The properties object of this resource is where the magic happens, which tells Bicep that the “extension” you’re creating is one that you’ve created yourself to run a script. The publisher value is still Microsoft, but the type is “CustomScriptExtension”. The settings object is where you specify everything you need to tell the extension what script it should be running. In my case, the fileUris list only contains a single object, which is the variable containing the URL location of where my PowerShell file is stored on a Storage Account. Then the commandToExecute string contains the exact command that needs to be run on the VM to execute the PowerShell script I want, along with the required parameters of the script (which in this case is only the “password” parameter).
A cool feature of the custom script extension capability is that there is a protectedSettings object, which you can put any secret values into, and Bicep/ARM will keep those secrets hidden even in the log output of the template deployment. If you put those same values into the settings object instead, the values passed into those parameters would be displayed in the deployment log, which isn’t good for keeping secrets. For my protectedSettings object, I passed in the storageAccountName where the PowerShell script is saved and the storageAccountKey to provide access to that Storage Account. While the name isn’t secretive, I did put it in the protectedSettings to get rid of a warning in the VS Code editor.
Summary
Whew! That was a lot to get through! I hope my breakdown above of all resource creation steps needed for a Bicep template creating an IaaS virtual machine proved helpful to you. There are so many little pieces that go into creating a Virtual Machine through a Bicep template that you never really see when creating the same resource through the portal. If there is anything that I didn’t clarify well enough, please let me know in the comments, and I will clarify the best I can. There are a lot of lines that go into making this type of Bicep template, and it felt like a big time suck at the beginning of writing it, but it is worth the time to create the template to very quickly deploy this resource type repeatedly in the future whenever you want.