One of the easiest ways to duplicate SQL Server database objects from one database to another–such as in a situation where you want to copy the structure of a production database down to a development database to help with testing and development–is to create a file called a DACPAC from the database you want to copy. With SQL Server, there are two ways to copy a database without creating and restoring a full database backup: 1) Create a full copy of the database structure and data by exporting to a BACPAC file, or 2) Create a copy of only the database structure by exporting to a DACPAC file.
This post will cover how you can import a previously generated DACPAC file onto an Azure SQL Database to duplicate the structure of another database with little effort on your part. It specifically covers copying an existing Azure SQL Database to another Azure SQL Database. This process may work with on-prem or managed instances of SQL Server, but I haven’t tested that yet.
What’s in this post
- Prerequisites
- What are DACPACs and BACPACS?
- Why use a DACPAC?
- How to Create a DACPAC File
- Using a DACPAC to Format an Azure SQL Database
- Can’t I just import the DACPAC from the Azure Portal?
- Summary
Prerequisites
- Have SSMS available to use
- Have an existing Azure SQL Database ready to copy
- Have an Azure SQL Server or Database to load the DACPAC to
Note: The source and target databases can be on the same Azure SQL Server or on different ones.
What are DACPACs and BACPACS?
There have already been many blog posts written on the subject of the difference between DACPACs and BACPACs, so I will refrain from trying to duplicate that information. Essentially, a DACPAC is an export of the schema/structure of a database, including the database users and logins. A BACPAC is similar to the DACPAC except that it contains the data from the database as well. If you would like more detailed information about both of these types of files, I recommend reading this post from SQLShack.
Then if you’re like me and are now wondering what the difference is between a BACPAC file and a full database backup (BAK file), I found this resource on SQL Server Central that explained the difference well.
Why use a DACPAC?
As I mentioned in the introduction above, the primary use case for making and importing a DACPAC file of your database is to quickly copy all database objects–including tables, procedures, functions, and even users–to a new version of the database, such as when trying to create a new dev version of an existing production database. That was my exact use case and what triggered me to write this post. I got tired of manually copying tables, procedures, and functions from one database to another whenever we needed a new version of a database.
How to Create a DACPAC File
When you have a source database that you would like to copy over to a new database, without the data, you should create a DACPAC from SQL Server using a “Task” on the database. To do this, right-click on the database name in the Object Explorer, select “Tasks” then select “Extract Data-Tier Application”. This will open a wizard for you to create a DACPAC file of the selected database.
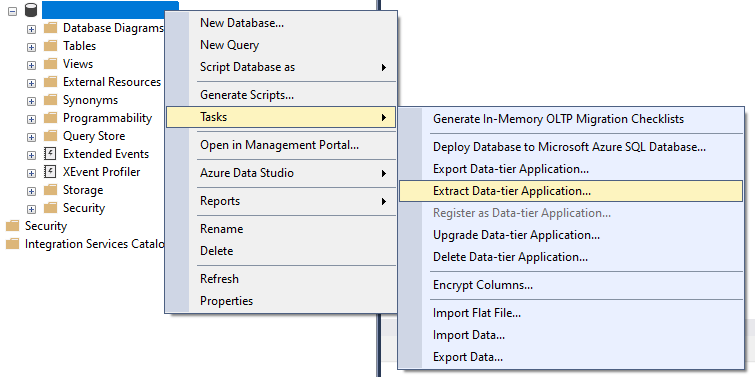
If instead, you click on “Export Data-Tier Application”, you will be brought to a wizard for creating a BACPAC file, which is not what we intend to do during this process, so make sure you choose the option to Extract a data-tier application.
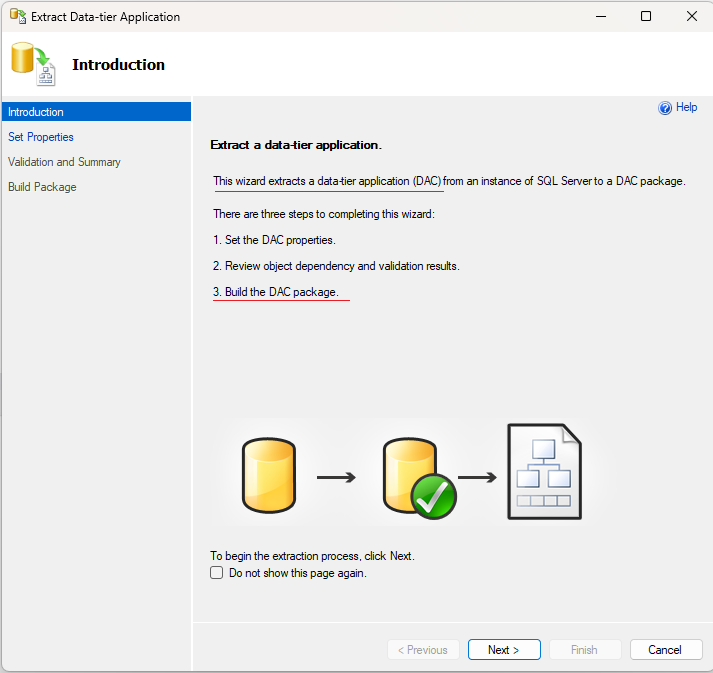
After selecting that option, you will see a screen like the following. Review the introduction page and make sure it refers to creating a DAC package (see screenshot below, underlined in red) and not a BAC package.
Step through the wizard, provide a name for the “Application” (database name), and choose where you want the file to be downloaded to on your local machine.
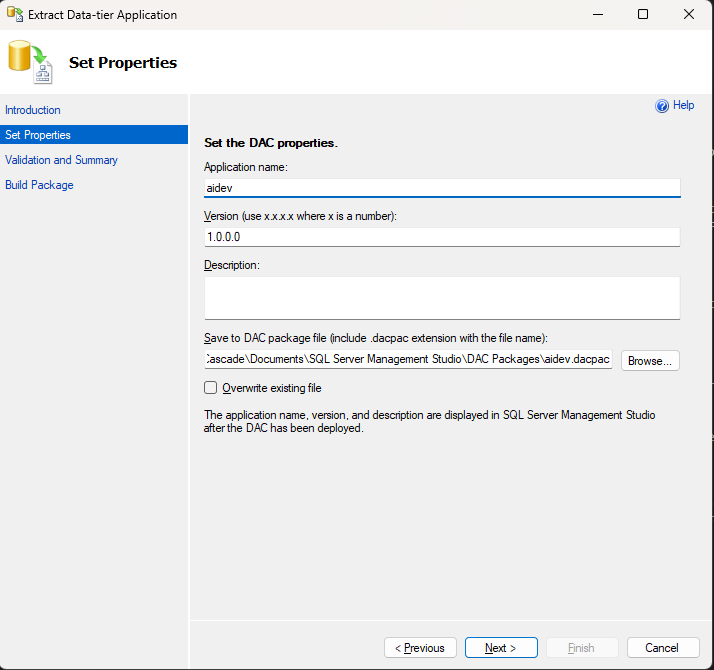
Once you have reviewed the settings for your file, click “Next” until the creation process starts. Once that has been completed, you will have successfully created a DACPAC file which is stored in the location that you chose.
Using a DACPAC to Format an Azure SQL Database
There are two different ways that you can deploy a DACPAC to an Azure SQL Server. The first way is to deploy the DACPAC to create a database, the second is to update an existing database with the DACPAC.
Overview of the Steps
- Choose whether you want to create a new database with the DACPAC or update/format an existing database
- If choosing to create a new database:
- Right-click on the “Databases” folder in the Object Explorer of SSMS, choose “Deploy Data-tier Application”
- Specify the DACPAC you want to use and the name of the database you want to create
- Run the wizard which will create a database with default settings
- If choosing to use an existing database, whether blank or already in use:
- Right-click on the database, select “Tasks” then “Upgrade Data-tier application”
- Specify the DACPAC file you want to use
- Review the changes the wizard identifies between the DACPAC and the target database
- Run the wizard which will update the target database with all changes necessary from the DACPAC
Deploying a New Azure SQL Database using a DACPAC
If you want to make your new Azure SQL Database on an existing Azure SQL Server and don’t want to do that through the portal, you can create a new database on the server by “deploying” a DACPAC to create a new database.
The main downside to this method of using a DACPAC is that the database will be created with the default setup, which for me is a General Purpose standard database with 2 vCores. That level of database may be pricy for some people, or it could be underperforming for others, depending on your needs. Due to that downside, that is not the method I chose to use my DACPAC with, but I still researched it so I could understand both ways. If you want to know how I used a DACPAC, skip down to the section for “upgrading” with a DACPAC below.
Deploying a Data-Tier Application
To create a new database from a DACPAC, you first need to connect to your target server through SSMS in the Object Explorer. Once you have connected, right-click on the “Databases” folder and choose “Deploy Data-Tier Application” from the list.
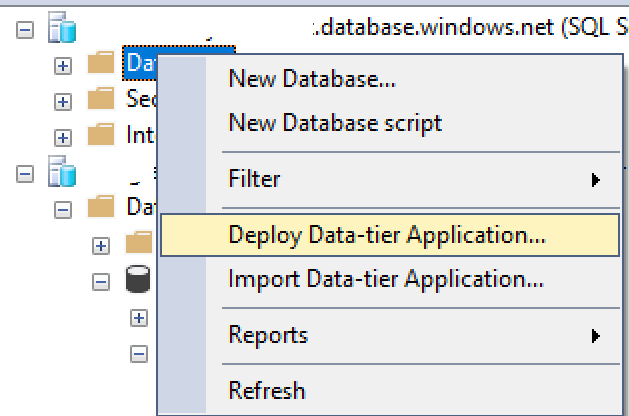
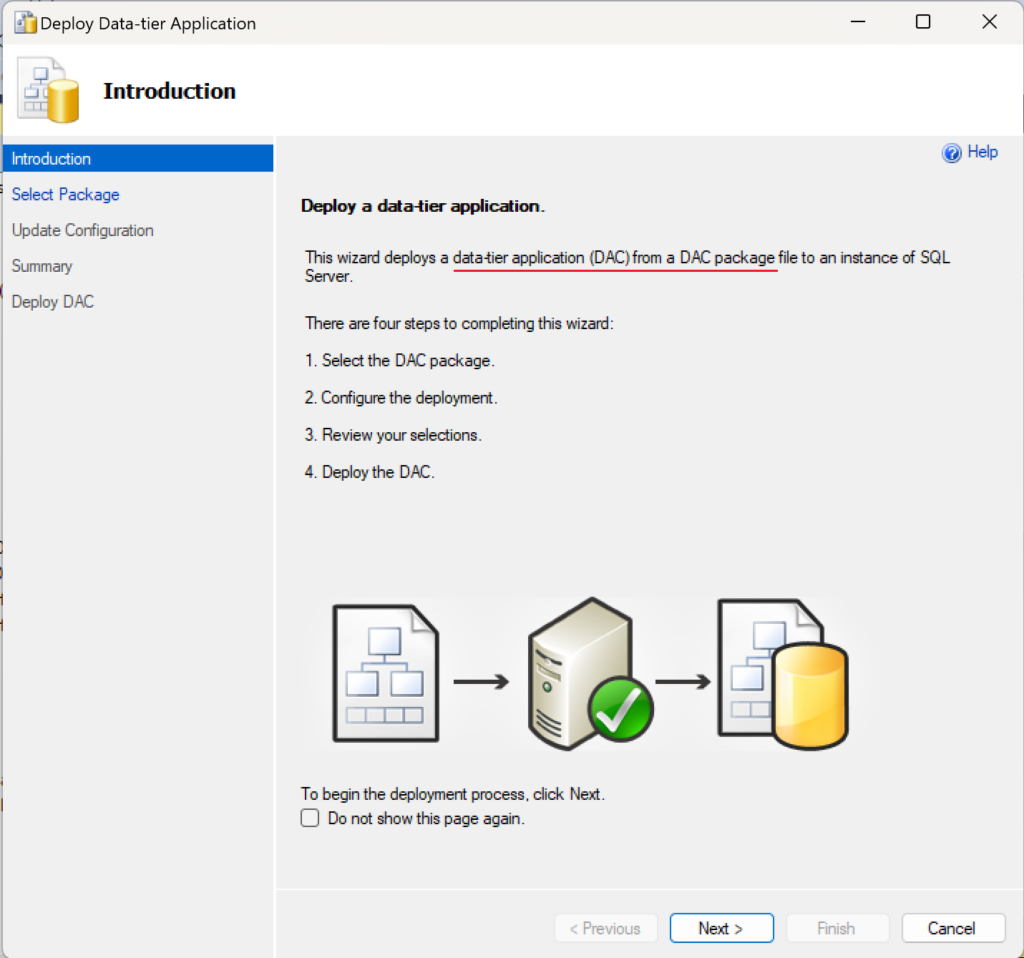
This will open a wizard that is very similar to the one for “upgrading” a data-tier application (discussed below). On the overview page of the wizard, you can confirm that you are going to deploy a DACPAC and not a BACPAC.
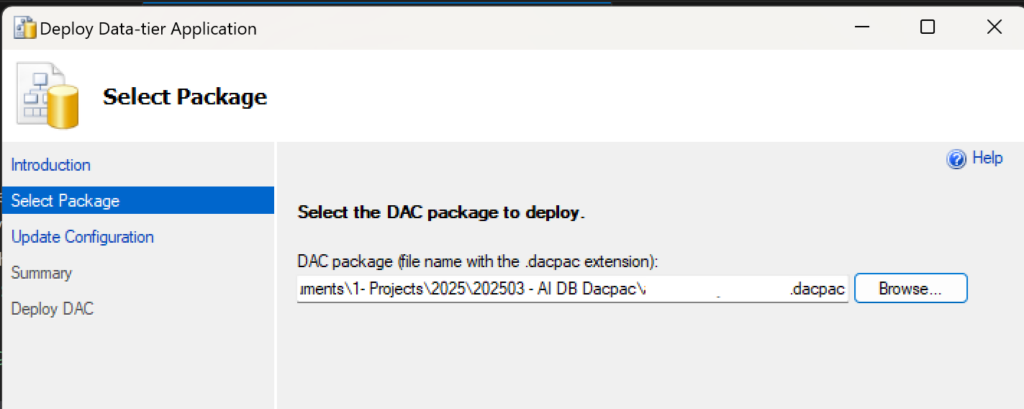
The first thing you will need to do in this wizard is to choose the DACPAC file you previously created.
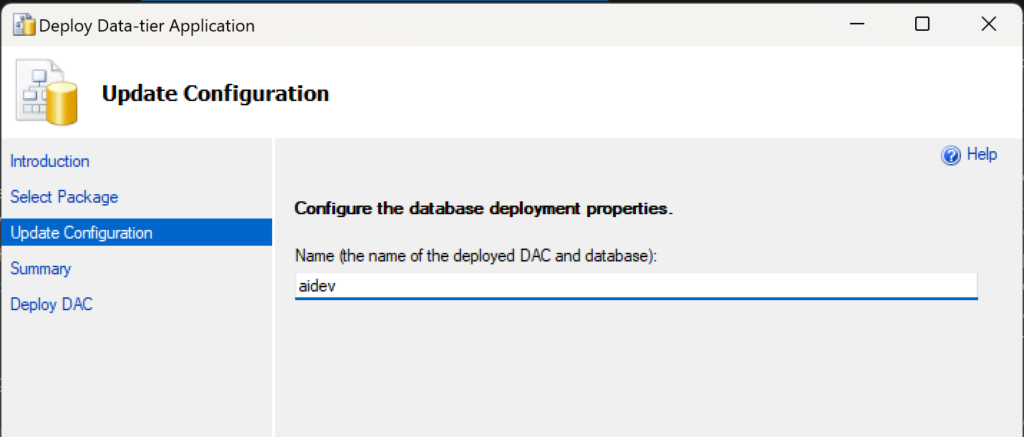
Click Next to move to the following page, where you will choose the name of the database you will deploy.
Click Next to move to the Summary page and review the process that the wizard is about to execute to ensure everything is set the way you want. Click Next again to deploy the DACPAC and create a new database from that file.
Once that process completes, you can close the wizard and then check on your database through the Object Explorer to see that you now have a new database with the same objects as the source database. At this point, you will also be able to see the newly created database in the Azure Portal under that SQL Server, where you can make any changes you would like to the default setup chosen by the deployment.
Updating or Formatting an Existing Azure SQL Database with a DACPAC
This method of “updating” an existing Azure SQL Database is helpful if you already have a database that you want to align with another, or if you have already created a blank database meeting your standards that you want to quickly deploy database objects to. In the previous section, the method of “Deploy a Data-Tier Application” creates a new database from the specified DACPAC, but that database is created with the default Azure SQL Database settings, which is “General Purpose: Standard-series (Gen5), 2 vCores”. That database setup is estimated to cost (in our setup) $373 per month.
If that default setup for a database doesn’t work for you or you don’t want to fix that after the database has been created, you can use this second method of “upgrading” your existing database with the DACPAC. Before you can complete this method, you first need to create a blank database on your Azure SQL Server, through whichever method you prefer. Or use any other existing Azure SQL Database that you are fine with overwriting with the DACPAC.
Upgrading a Data-Tier Application
Connect to your target database in SSMS through the Object Explorer. When you are ready to import the source database objects onto this new database, right-click on the empty database then select “Tasks” then “Upgrade Data-tier Application”.
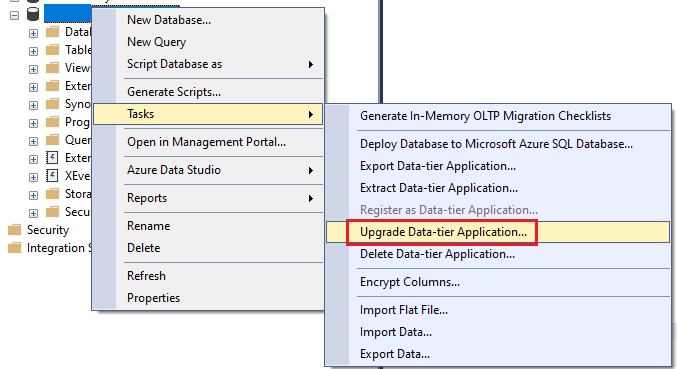
This will open another wizard that will walk you through the process of “upgrading” your chosen database with the DAC package of another database.
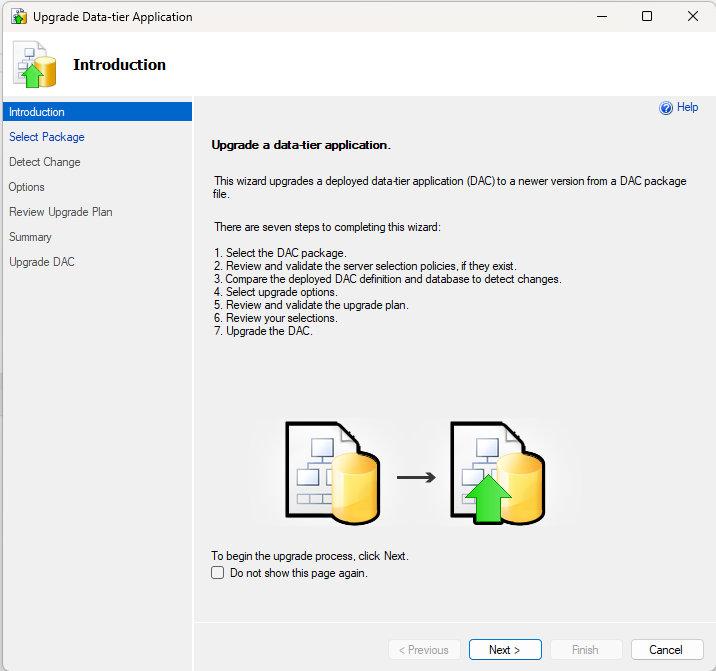
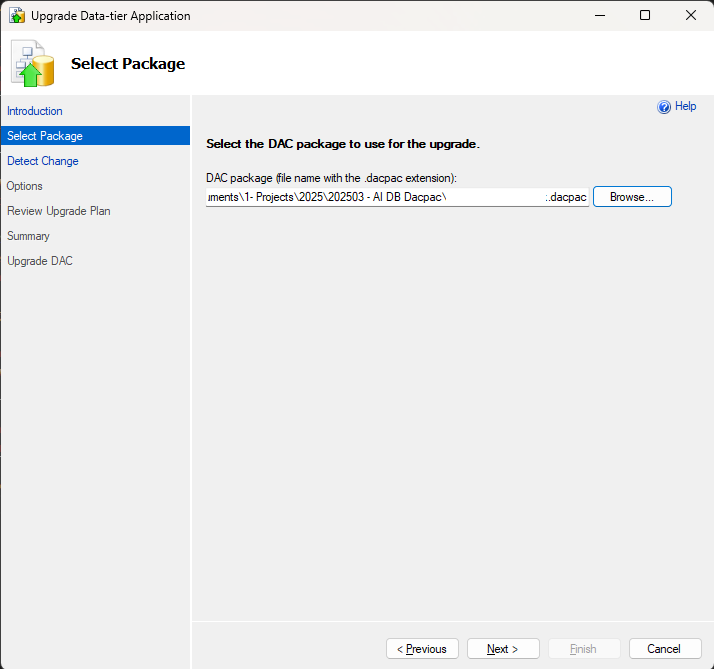
On the second page of the wizard, you will be prompted to select the DAC package you would like to use for the upgrade. Browse to the DACPAC file you created earlier, then click Next.
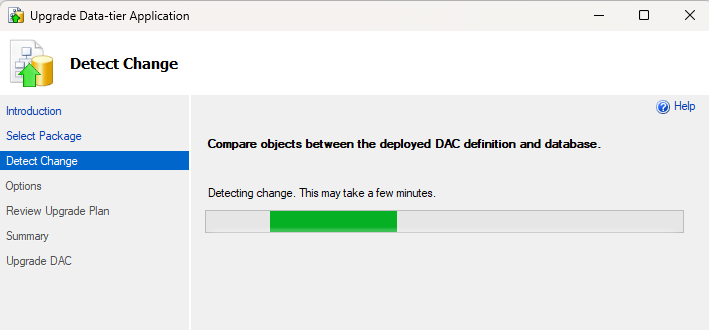
After you click Next, the system will start detecting changes between the target database and the DACPAC you selected, which may take a few minutes.
If you have already imported the DACPAC before or have anything on your target database that is different from the source, you will receive a warning like this:
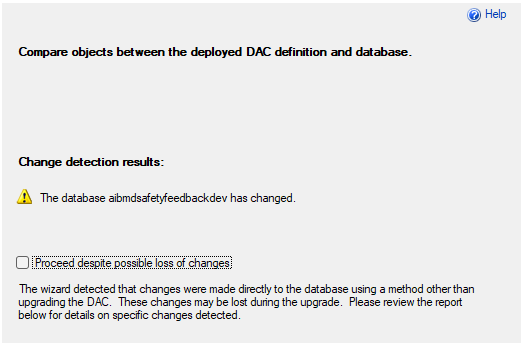
I got that warning because I had already imported the DACPAC so I no longer had a blank database. In this situation, you are required to check the box that you’re okay with overwriting the existing structure by continuing. If it’s your first time attempting to import the DACPAC onto a blank database, you should instead receive a green check box on this page.
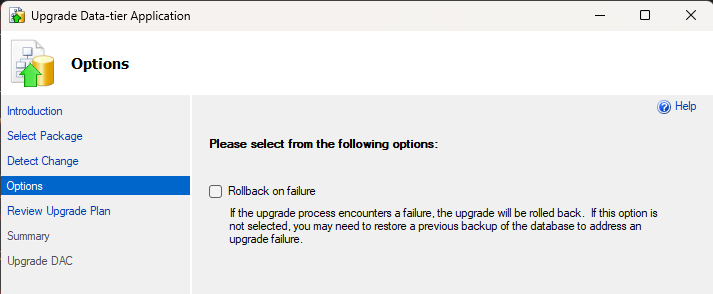
On the next page, choose whether or not you want to roll back in the event of a failure during the “upgrade”. I chose to not have it roll back since this was going to be a new dev database that I could tweak, fix, or simply recreate if something went wrong. You may want to choose differently.
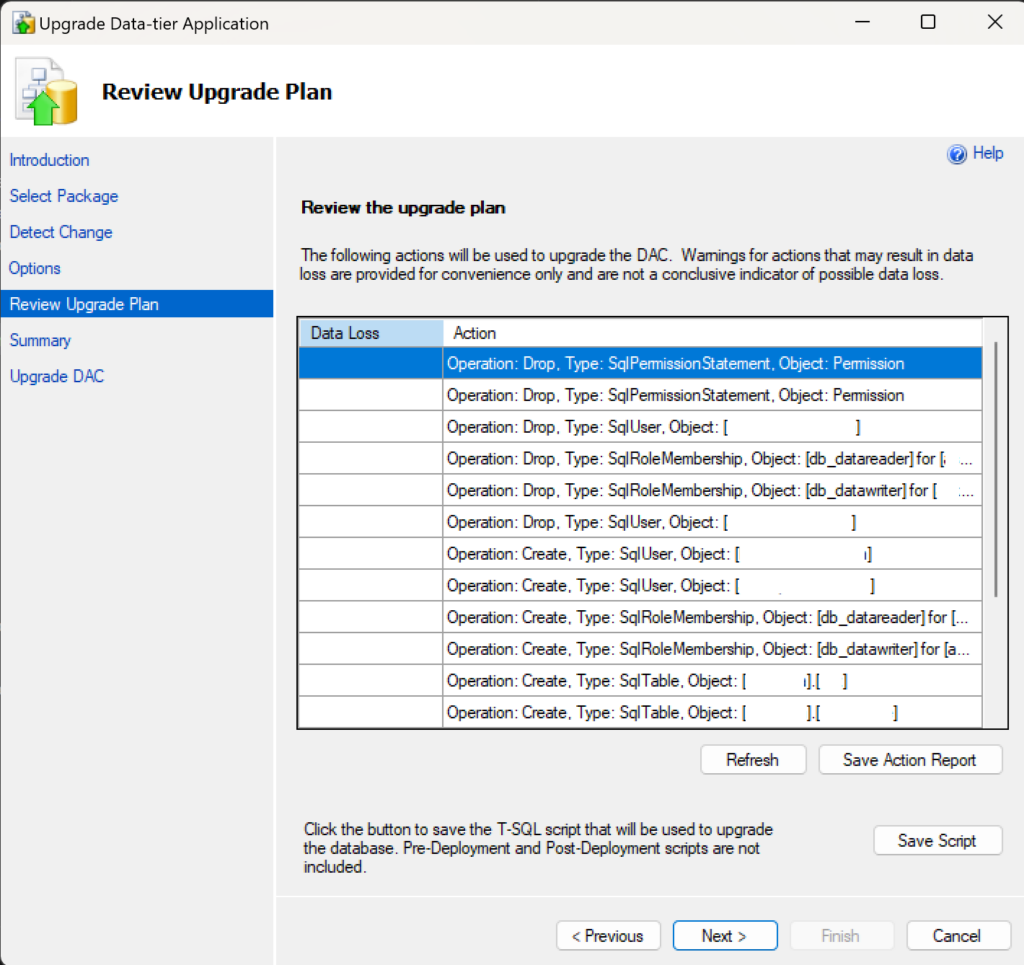
The final step will be for the system and you to review the “upgrade” plan. You will see a list of all changes that will be applied to the database on the “Review Upgrade Plan” page. If you’re happy with the proposed list of changes, click Next until the upgrade process starts and the DACPAC gets applied. Once that process completes, you can close the wizard and then check on your database through the Object Explorer to see that you now have database objects deployed to the database that you didn’t before.
Can’t I just import the DACPAC from the Azure Portal?
This was the first thing I tried when trying to import my DACPAC into an Azure SQL Server. I uploaded my DACPAC file to a storage account, then clicked “Import” on the SQL Server page in the Portal. This started a new deployment where the SQL Database was created but then the deployment of the DACPAC to the database failed so I was left with an empty database on my server. The error I received when the deployment failed was related to not specifying a BACPAC file for the import process, so it expects that file type instead of a DACPAC.
If you can figure out how to import a new database to a SQL Server using the Portal, I would love to hear about it in the comments below.
Summary
If you, like me, were confused about how you could import a DACPAC file into a database on an Azure SQL Server (because the Microsoft documentation for this isn’t great), I hope these instructions help you with your import. It is as simple as creating the DACPAC file and then using a wizard to “upgrade” or “deploy” your database using the DACPAC.

