
In a recent post, I gave an overview of what Liquibase is and what features it offers as a bare minimum. This week and next, I am going to give the step-by-step instructions I followed myself to learn how to properly set up a Liquibase project after playing with it for several hours. I personally found the documentation offered by Liquibase a little confusing, so this post is essentially the notes I took while figuring out what I really needed to do to set up a demo project with the tool. The aim of this post is not to be an exhaustive tutorial of the software, since I am far from an expert of Liquibase. Let me know in the comments if you found any of this useful or interesting!
What’s in this post:
- Download Liquibase and install it on your computer
- Verify that Liquibase is properly installed on your computer
- Create your first Liquibase project
- A quick note about changelogs and changesets
- Summary
- What’s in the next post
Download Liquibase and install it on your computer
I won’t provide a link to it here (because that would be sketchy), but you can find the tar or Windows installer download for the free (open-source) version of Liquibase on the Liquibase website under Editions & Pricing > Open Source. I used the Windows installer version since I am working on a Windows machine. After you download the installer, you can run it to install the tool. I did not change any of the setup options (there were very few). The installation and setup were both extremely fast.
After the installer runs, you should be able to see where it was downloaded, which for me, was under Program Files. Now you can start working from that downloaded folder for the program, or you can copy the entire folder to another directory so you can play around with it without the fear of breaking something and then having to reinstall everything to fix issues. I made a copy in another location and worked from that copy (which was suggested by one of the Liquibase tutorials).
Verify that Liquibase is properly installed on your computer
The next important step is to verify the status of the tool to make sure it installed correctly. To do this, you want to open a command prompt window and navigate to the directory of the liquibase folder that you want to work with, then run the command “liquibase status“.
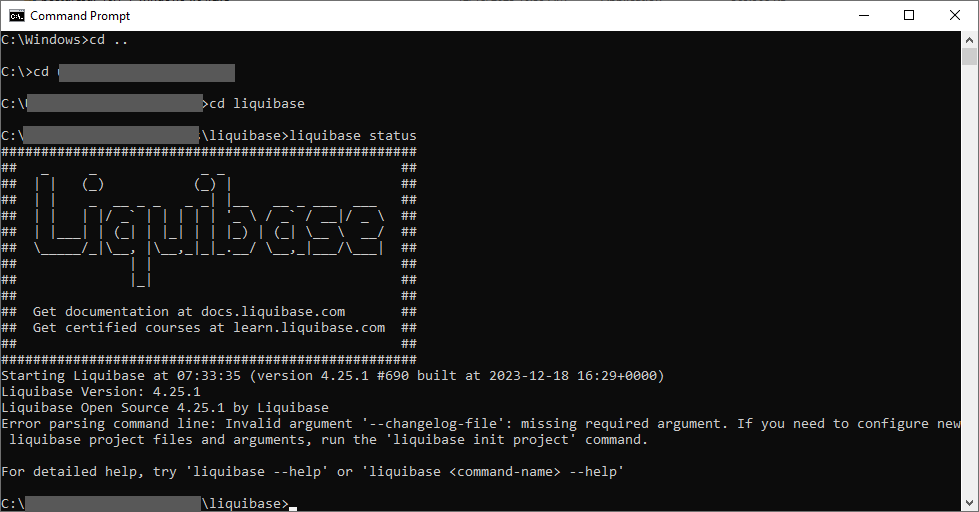
As you can see in the above screenshot, although I had an error returned by the “status” command (since I haven’t setup a Liquibase project yet), the tool did run and work (as evidenced by the giant Liquibase printout). Download and installation of the tool was successful.
Create your first Liquibase project
Creating your first project is simpler than I originally thought it was. I knew that at a bare minimum, a file called “liquibase.properties” needed to be created, but I thought that I had to do that manually (mostly because I did skip a page or two in the documentation that I thought weren’t needed). Although it is possible to create that file manually and then manually enter the necessary values to create a project, the easiest way to setup a new project and all of its necessary files is to use the “init” command, “liquibase init project“.
That command will run you through the process of setting up a new project, including setting the necessary values for the liquibase.properties file. If you are fine with using all default settings for your project, specify “Y” when prompted, otherwise specify “C” which will allow you to customize the values used by the project so you can work with your own database.

What I specified for each of the setup prompts:
- Use default project settings or custom? Custom, “
C“ - Relative path for the new project directory? In the main Liquibase folder, not in a subfolder, “
./” (I would likely change this for an actual development project if I was creating one for work) - Name for the base changelog file? “
mydatabase-changelog“, but you can set it to whatever makes the most sense to you. I definitely wouldn’t use that format for an actual work project if we move forward with this. - Changelog format? “
sql” since I am working with a normal SQL database - Name of default properties file? “
liquibase.properties“, the recommended name, but you could change it to something else - JDBC URL to the project database? “
jdbc:postgresql://localhost:5432/postgres“. This points to the database called “postgres” on my local machine, which is a PostgreSQL database so it uses that type of connection string that I specified. Other database engines will have their own connection string format. - Username to connect to database? “Postgres”, the default user for a new PostgreSQL database, which is what the project should use to interact with the database. You should change this to a better-defined user just for the Liquibase tool.
- Password? The password associated with the specified user. For real-world purposes, I hope we’ll be able to use a secrets manager tool to update that file for deployment purposes so that we don’t have to specify that in clear text in the file.
New Project Files
After you go through all of the above steps, Liquibase will have created several new files for you. I am not sure what most of them are for at this point, but I think some of the other files besides the properties file that were created are used for CI/CD integration (flow files). The properties file I created for my project now looks like this after my project setup:

If you have a license key for the enterprise/Pro version of the software, you can scroll to the bottom of this file and uncomment the line “liquibase.licenseKey:” then add your license key after the colon on that line.

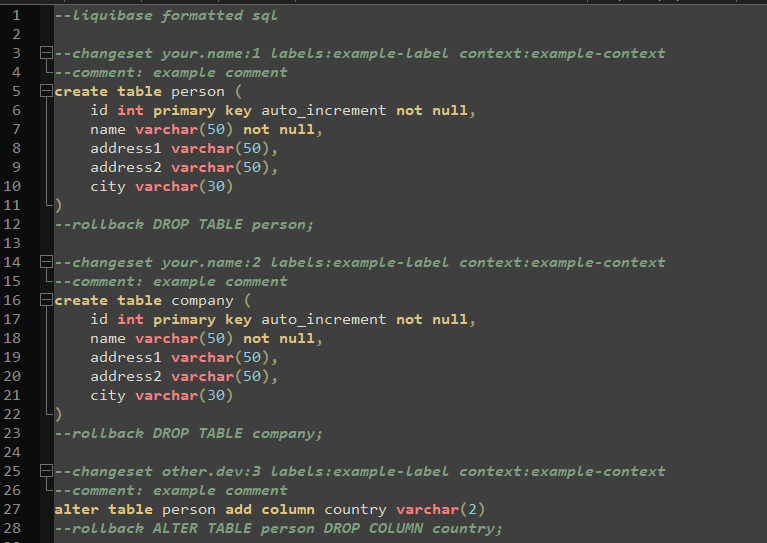
You can also review the default changelog file created by Liquibase if you specified that during project initialization. For me, the file contains some sample changesets that don’t relate to my actual database:
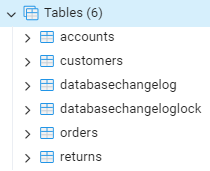
These are the tables in my database for the Liquibase project:
To set up this file to represent your database, we’ll need to use the “generate-changelog” command on the project, and I’ll walk through that in the next post.
Database changes made with project initialization
As you can see from the last screenshot above showing what tables I have in my database, there are two tables called databasechangelog and databasechangeloglock. Those two tables will be created in your project database when you connect Liquibase to the DB because that is how the tool keeps track of what changelogs and changesets have been applied to the database already. You can also prevent some changes from being executed when the changelog is applied, and those changes will be tracked with the “lock” table.
You are now ready to start making changes to your database and tracking those changes with Liquibase!
A quick note about changelogs and changesets
The changelog is the main file (or files) that contain the queries you use to interact with your project database. You can have just one or you can have a series of changelogs, each used for a different part of your database.
Each changelog file contains what Liquibase calls the changeset, which is a single unit of change for your database, like an ALTER TABLE statement or any other DDL statement you can run against a database. A changeset is identified in the changelog file with a comment line which will contain the change’s author and then a change number which can essentially be any number you would like to track the changes. If you use the above steps to have Liquibase create your first changelog file for you, it will create a randomly generated version number for each of the queries listed in the file. This number will determine in what order the changes will be applied.
Summary
In this post, I covered how you go about setting up your first Liquibase project and what each of commands and files related to that means. This tool is surprisingly simple to work with, as can be seen with the initial setup process. Next week, I will be covering what you do now that you have the tool successfully installed and set up on your computer.
What’s in the next post:
- Create the baseline changelog file for your database
- Adding and tracking ongoing database changes
- Method 1: Adding scripts to changelog file
- Method 2: Making changes in your IDE
- Structuring your changelogs according to best practices
- Outstanding questions
- Summary